The Zeiss Distagon T * 15mm is an amazing lens and for me, that I like so much to take long exposure picture, the removal of the original lens hood has been a necessary step in order to be able to use additional filters like the Lee ND filters.
In photography a ND filter (where ND stands for Neutral-Density) is a filter that reduce the amount of light entering the lens. Doing so the ND filter allows the photographer to select combinations of aperture, exposure time and sensor sensitivity that would otherwise produce overexposed pictures.
For example, as you may see in my other article about the ND filter chart, one might wish to photograph a waterfall at a slower shutter speed to create a deliberate motion-blur effect.
MODE A:
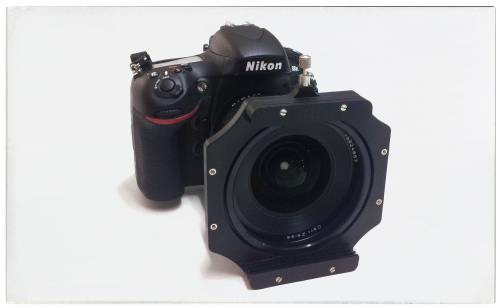
The first way to use any Lee ND filters with the Distagon T*15mm is to use the Lee Filters 95mm Adapter Ring.
In the image below you can see: the Zeiss Distagon T*15mm (with the modified lens hood); as it is on the left while on the right after having screwed on it the Lee Filters 95mm Adapter Ring.
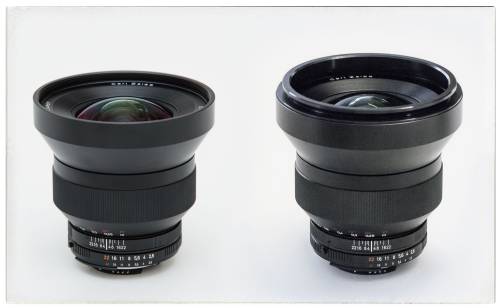
On the right the Lee Filters 95mm Adapter Ring mounted on the Distagon T*15mm.
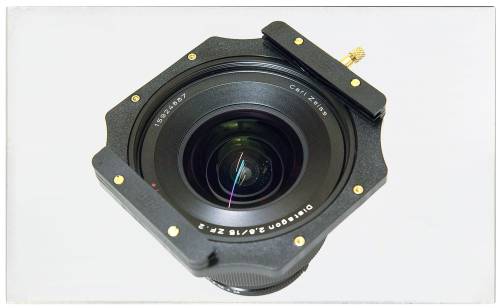
The Lee Filter Holder seamlessly engages on the Lee Filters 95mm Adapter Ring but the inside diameter of the adapter measures 85 mm and “invades” the field of view of the lens.
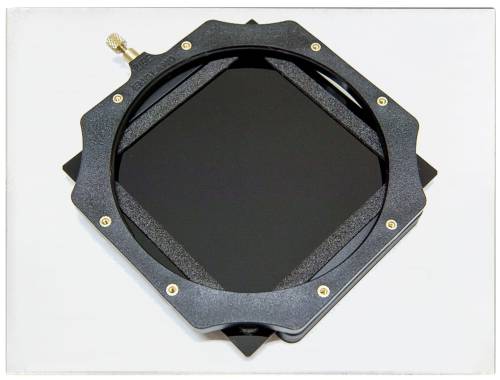
The filter holder, complete with filter holder guides, hooked adapter from 95 mm Distagon already screwed on.
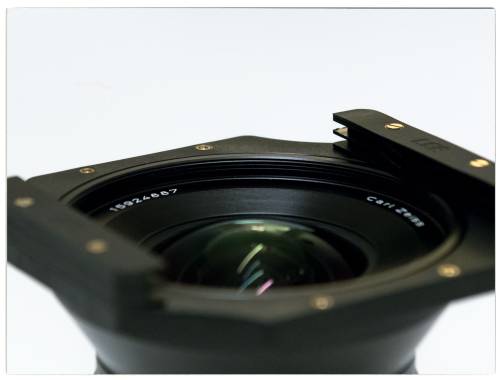
Because of the “invasion of the lens field of view” you have to be careful to position the sides of the filter, the ones where there are filters guides, at the top and bottom ie vertical axis of the camera body. Otherwise, even these end up in the field of the lens.
The photos I took to show “the invasion” in were taken with a Nikon D800E on which I mounted the Distagon. All photos were taken at ISO-100 and aperture f/11 because at this aperture the Distagon T*15mm has no longer any fall-off that, if present, would increase, on the corners of the image, the interference produced by the corners “invasion”.
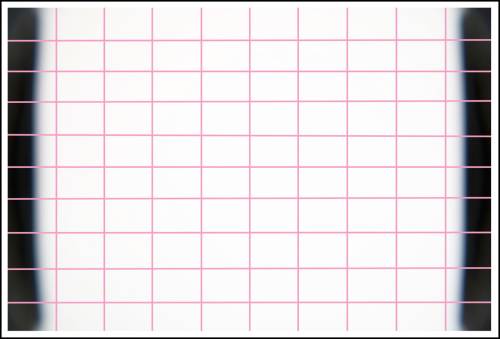
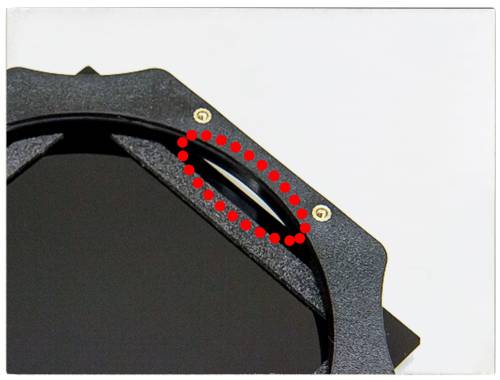
Holder with filter holder guides positioned to the LEFT and RIGHT to the horizontal axis of the machine.
In the picture above, it’s possible to see the disturb that the Lee Filter Holder, coupled to the lens via the Lee 95mm adapter, creates invading the field of vision of the Zeiss Distagon T*15mm. The filter rail guides are positioned to the LEFT and to the RIGHT with respect to the horizontal axis of the camera body. The disturb is present over the entire length of the left and right sides of the field of vision and has an overall incidence of about 15%.
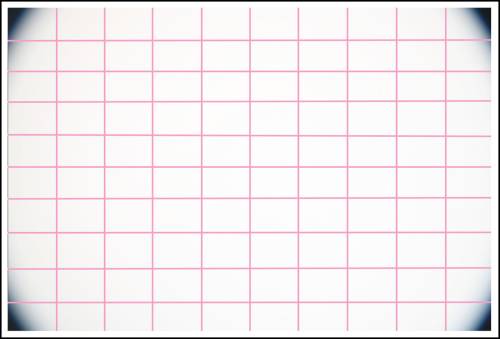
Field of vision with the Filter Holder rail guides positioned UP and DOWN with respect to the vertical axis to the camera.
In this second image, we can see the different type of disturb we have in the field of vision of the Zeiss Distagon T*15mm with the filter rail guides positioned in ABOVE and UNDER with respect to the horizontal axis of the camera body. The disturb is present only in the angles of the visual field and has an overall incidence of less than 2%.
In this picture we can see the Filter Holder rail guides positioned ABOVE and UNDER with respect to the horizontal axis to the camera.
PROS Mode A:
It’s very easy to put together the Lee Filters 95mm Adapter Ring on the lens. With it we can use the standard Lee Filter Holder.
CONS Mode A:
It’s a great shame to give up 15% of the area of a photo and definitely unacceptable if you use a superb wide angle lens like the Zeiss Distagon T*15mm which has a superlative optical performance even at the edges.
MODE B:
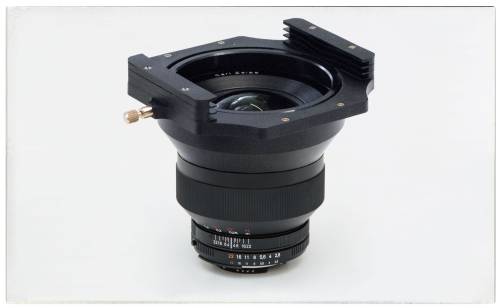
This solution is the use of the Lee Push-on Holder. This device is connected to the lens by inserting it directly on the body of the lens as the Holder as the same diameter of the new body of the Distagon; the one we have form Zeiss once we remove the original lens hood.
The Lee Filters Push-on Holder connected to the Zeiss Distagon* 15mm.
PROS Mode B:
The Push-on Holder is well made and the thickness between the lens body and the holder match perfectly.
The Push-on Holder, it’s flush is on the top of the lens body, therefore the ND filters are “glued” to the lens. I don’t think there is a better way to have the ND filter closer to the lens than with the Push-on Holder.
In this image it’s possible to admire how close it’s flushed the Push-on Holder with the top of the lens body.
Using the Push-on Holder the “invasion” in the field of vision of the lens is less than 1% and it’s faint as well.
CONS Mode B:
The only one relevant problem with this 100mm diameter system is that the original soft seals on the BIG and LITTLE stopper remain too much “inside” with respect to the holder or to the Zeiss camera body, therefore there is a little light infiltration that spoil any long exposure shot.
The BIG stopper mounted symmetrically into the filter guides of the Push-on Holder.
Details of the area where the light infiltration occurs.
Since the use of this devices is intended to take long exposure shot, any light infiltration is not tolerable. Among the different solutions I’ve tried, the only one that pleased me was to apply directly on the BIG and LITTLE stopper some velcro strips. Once placed correctly this velcro strip has sealed the areas where the light was passing through. It’s a handcrafted solution but it works efficiently!
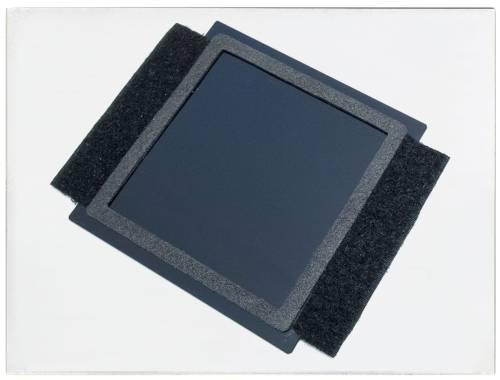
The BIG stopper with the two velcro stripes applied where the light was passing through.
The BIG stopper, with the velcro stripes, mounted back into the filter guides of the Push-on Holder.
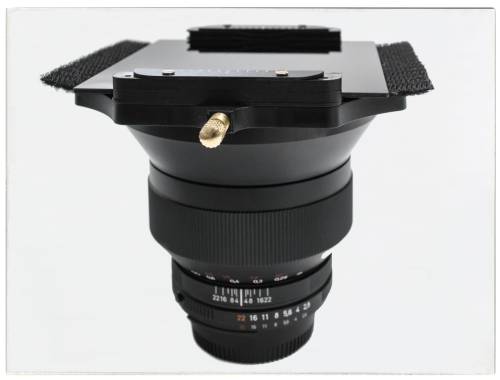
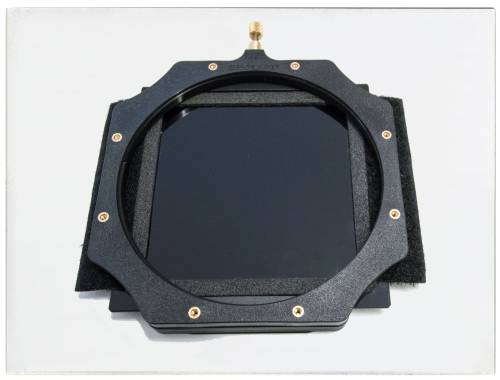
The Push-on Holder, with the velcro modified BIG stopper ND filter, back on the Zeiss Distagon T*15mm.
Maybe not a fancy but a pratical solution indeed.